algolia 创建账号
在 algolia 注册登录后,打开 dashboard
Indices -> new index,注意 indexName 中不要有英文引号,避免不必要的麻烦
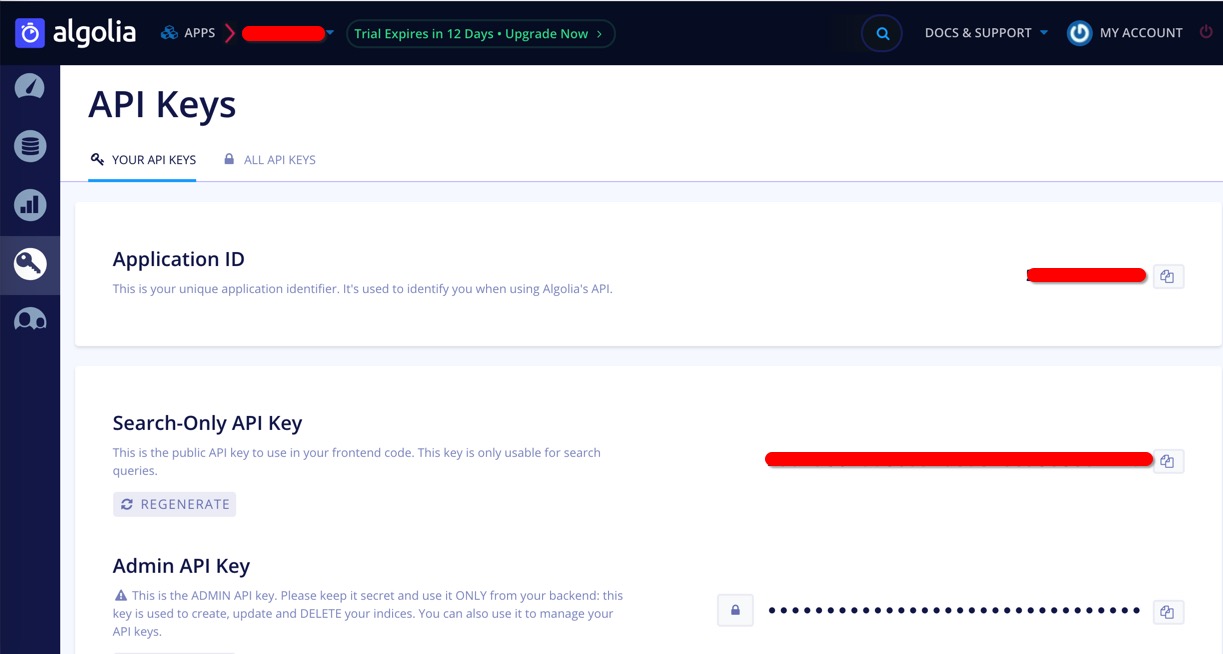
API Keys 中查看 id/keys,需要:1
2
3Application ID
Search-Only API Key
Admin API Key

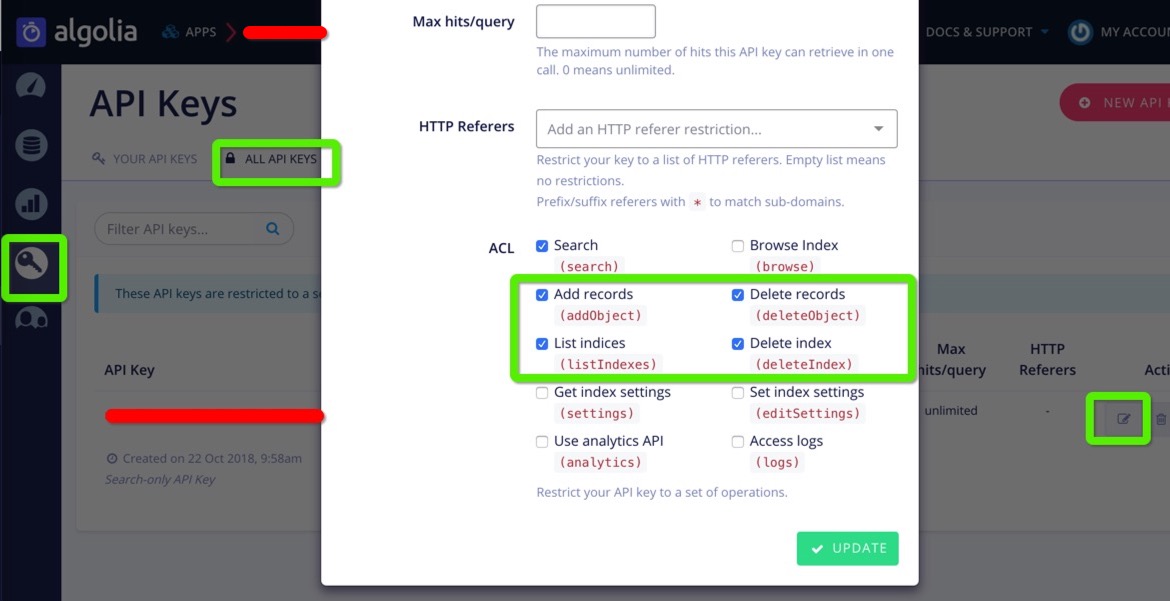
API Keys -> ALL API KEYS 中修改配置,勾选 Add records/Delete records/List indices/Delete index
hexo 配置
在 _config.yml 中添加配置:1
2
3
4algolia:
applicationID: 上面的 Application ID
apiKey: 上面的 Search-Only API Key
indexName: 上面创建的 new index 的 indexName
安装 hexo-algolia
1 | npm install hexo-algolia --save |
设置环境变量
algolia 官网声明,Admin API Key 不能写在配置里,会有风险,写到环境变量中(Mac):1
2
3
4vim ~/.bash_profile
# algolia Admin API Key
export HEXO_ALGOLIA_INDEXING_KEY=你的 Admin API Key
生成 algolia 索引
1 | hexo algolia |
提示成功后可以在 algolia Indices 中看到你的博客记录
修改 next 配置
themes/next/_config.yml 中修改:1
2
3
4
5
6
7
8
9# Algolia Search
algolia_search:
enable: true
hits:
per_page: 10
labels:
input_placeholder: 请输入关键字
hits_empty: "没有找到与 ${query} 相关的内容"
hits_stats: "${hits} 条相关记录,共耗时 ${time}ms"
